|
Fall classes are being formed! Below is the current schedule, please check the Class page frequently for any updates or class additions.
To register for any class series or workshop please go to the Class Registration page and locate the start date for each respective class or workshop. Upon receipt of your registration I'll send a confirmation email with details on what to bring, parking and so forth. Cash or Checks are accepted. Please make checks out to: It's Yoga with Sara Yoga for Beginners Two new class series are live and open for registration. Cost is $36 for each series. Classes are one hour in length for 5 sessions. Each week I've identified the topic that we will cover which you can find on the class page. Classes will be held on Tuesday evenings from 6:00 p.m.-7:00 p.m. Series 1: October 24, 31; November 7, 14, 21 Series 2: January 3, 10, 17, 24, 31 Gentle Yoga Two new class series are live and open for registration. Cost is $36 for each series. Classes are 45 minutes in length for 4 sessions. Class series information is below: Series 1: Monday nights 6:15 - 7:00 p.m. September 11, 18, 25; October 2 Series 2: Thursday nights 6:15 -7:00 p.m. November 30; December 7, 14, 21 Workshops Workshops will be held on Saturdays in December each from 9:00 - 11:00 a.m. Registration is now open and will remain open until one week prior to each workshop and/or once class is filled. Cost is $25 for each workshop. Props! How, What and When to Use in Your Yoga Practice Saturday, December 2nd Office Yoga: Restore & Rejuvenate at Your Desk Saturday, December 9th Chair Yoga: Another Approach to Yoga for Any Age and Fitness Level Saturday, December 16th
0 Comments
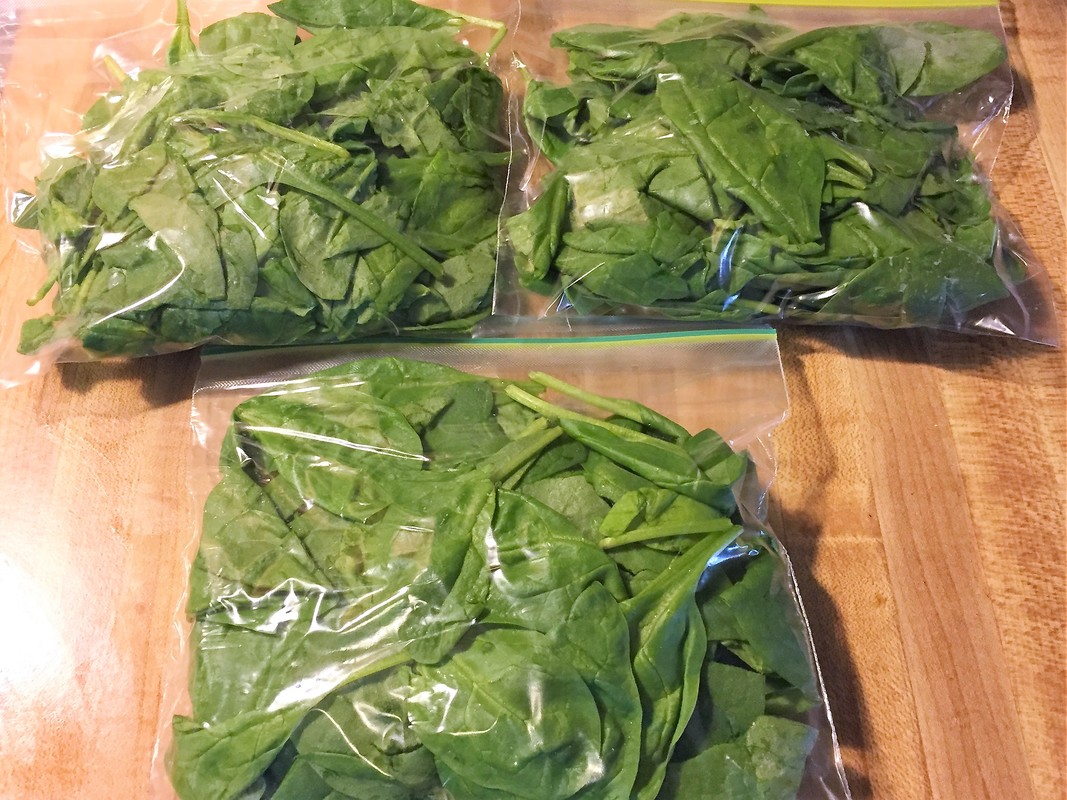
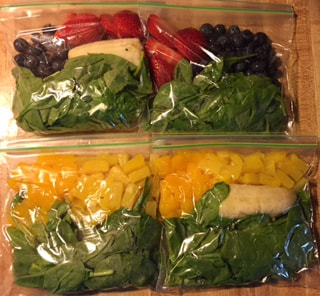
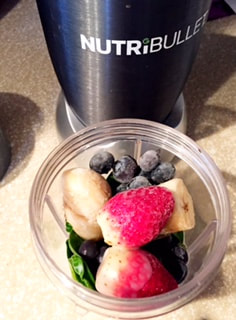
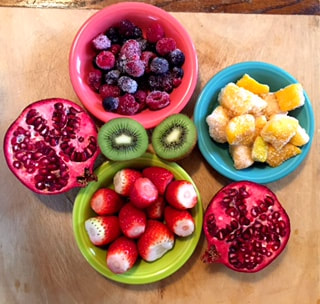
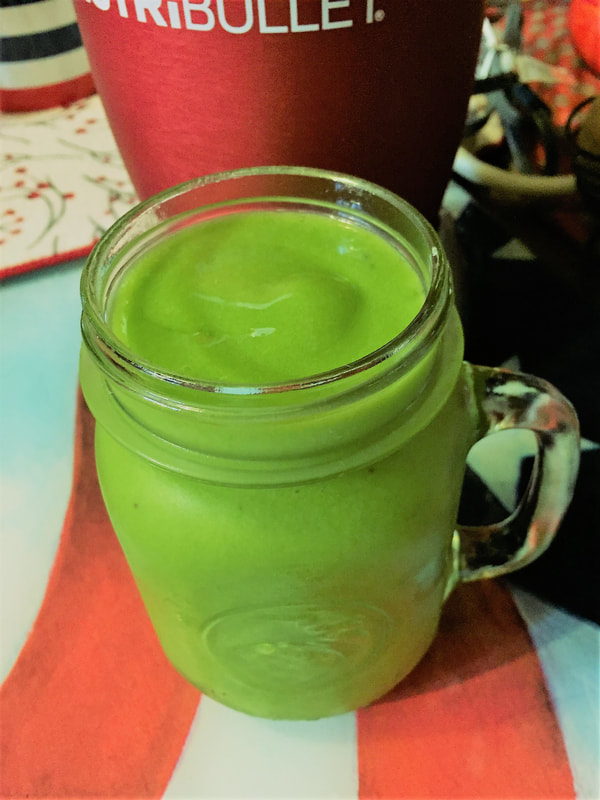 Looking for a quick and easy option to get your daily dose of fruits and veggies but in a yummy way?  Chair yoga is a great alternative to keeping consistent with or even starting a yoga practice. Finding a way to relieve stress is a question that I hear regularly and as we work more and relax less, our bodies begin to tighten and the health risks are numerous; ranging from mental and physical stress, tension and strain, to high blood pressure, inability to sleep well and obesity. Using yoga and pranayama techniques will aid in reducing and possibly getting rid of unhealthy stress. Comments that I hear about chair yoga:
Well, this couldn't be farther from the truth. Chair yoga will give your mind and body both a challenge as each pose will focus on the deeper muscles of the body but with support of the chair which will allow for less strain and easier balance providing you with the ability to better focus on proper alignment with each pose. Who benefits from chair yoga? Everyone! Seniors: Especially as we age and /or our mobility changes, getting up and down swiftly from the mat to standing poses can be a challenge. Using a chair, whether sitting down or using it for balance, plus modified yoga poses will bring the same benefits as a traditional mat practice allowing you to bend and twist with a stable base, Office Workers: Is your job causing you physical and mental stress but don't feel you have the time to take a fitness or yoga class before or after work? Do you sit hunched over your desk or cell for long periods of time with little movement? After a day in the office do you have a stiff neck, sore lower back, tight upper back, hips or shoulders? Sitting all day is not good for any of us, and if your workload keeps you too busy to stop and take a walk or attend a regular fitness/yoga class before or after work, performing a few yoga poses and stretches at your desk or somewhere in your office or work station can give you amazing benefits not only to keep your body limber and flexible but it will allow your mind to refresh. You won't need a yoga mat or special clothing and you won't even have to leave your desk! Students: studying in the library or in your bed or dorm room, whether at your desk or on your bed, with poor posture for hours on end is not good for your health, it places unnecessary strain on the lumbar spine, over stretches the mid to upper back and shortens the chest and hips, leading to neck, shoulder, and low back pain. Children: sitting still all day can be tough for little ones and teens. Chair yoga requires nothing additional from the standard classroom set up and helps students find more focus and confidence, especially great on a day that is stressful; plus it provides both a physical and mental break from studying and helps channel their energy. Chair yoga doesn't have to be a long series of poses, even a brief breathing exercise and a few poses can reap benefits for both children AND teachers! Remember, depending on the sequence of poses, your practice can either be energizing or calming, whichever you are needing at that very moment. Take a class with me or a private lesson or invite me to your workplace. Even 5 minutes can bring great benefits. Give it a try & let me know what you think! 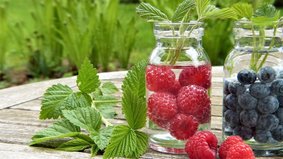 Staying hydrated is important throughout the year but with the weather warming up and the official start of summer soon approaching it is critical to stay hydrated throughout the day, especially if your daily activities bring on sweating! Whether you are merely going about your usual work day, gardening, mowing lawns or working out, your body naturally loses water, so keeping your water intake up is important to avoid dehydration. When you begin to feel thirsty you are already behind in proper water intake. How much water you need each day varies depending on what you are reading, however common thoughts range from 8 ounces 8 times per day (= 1/2 gallon) to calculating what you need based on your weight. Water not only benefits your overall health but it is also great to keeping your skin glowing! I start each day with three filled bottles to keep me on track and then refill as needed. This is my not-so- new favorite bottle and I take it with me everywhere, 365 days of the year. It keeps my cold beverages ice cold for hours and the same for my morning coffee (I use this one for coffee) with no bottle taste. Both fit easily in my cars' cup holder and bag. This brand offers a variety of colors, prints and designs in three different sizes; I happen to have styles in all three sizes! I happen to like the taste of water but sometimes I want something more and combining water with fresh fruit and herbs brings in great flavor. It's easy to add fruit and herbs directly into any water bottle but infuser bottles are easy to use, they keep your water and fruit/herbs separate and it's easier to remove the fruit/herbs when you want. You may remember this article where I shared my favorite combinations. This infuser bottle is the perfect size for me. There are many water bottles out there and it's a matter of personal preference for design, size and style that works best for you. What's most important is to figure out the best way for you to get your daily water intake and be consistent....all year round! Happy drinking! 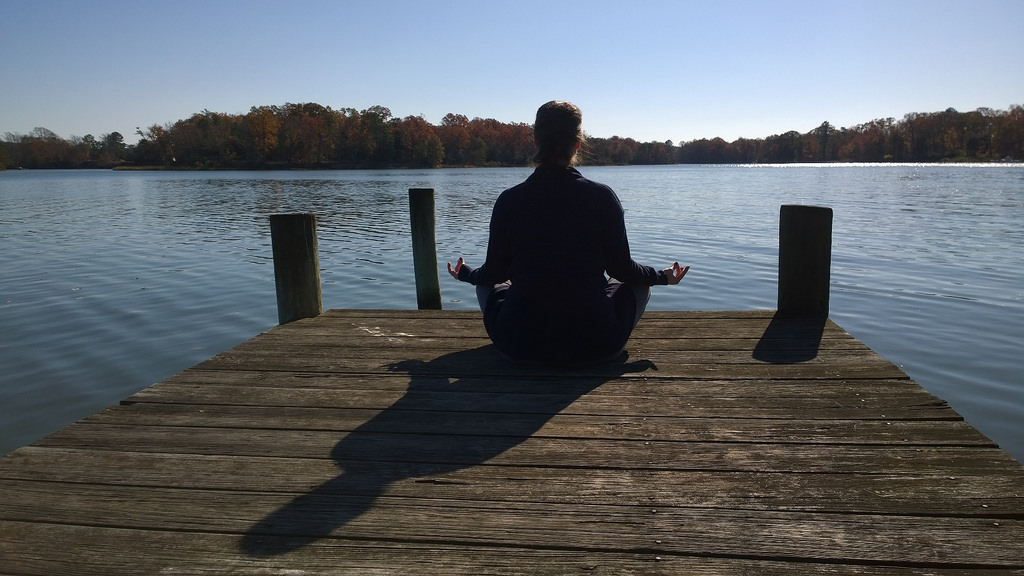 Join us in celebrating national meditation month! It's true that meditation can be done anywhere, by anyone and at anytime. From a few minutes of calm and quiet reflection to a lengthier guided session the long term benefits of meditation are numerous. Take a moment each day this month to develop a routine that will last a lifetime. Meditation takes no special equipment or training. Simply find a quiet place in your home, your office or a place that brings you happiness, be it inside or outside taking in the beauty of nature. Sit in a comfortable position, making sure you are not to warm or too cold, and sit in silence and clear your mind. Allow all of your senses to take in your surroundings, close your eyes taking in long deep breaths, holding each one for just a moment and then slowly release each breath until your body and mind are calm and relaxed....then just enjoy the moment of quiet. It's natural that 'stuff' will pop into your head especially when just beginning a meditation practice, acknowledge briefly and then move those thoughts out and return to being present in the moment enjoying the stillness. A few of the top benefits that you will experience include: Vision- meditation allows us to gain a clear vision of what we want from our life, our jobs, our health, our family and what we rank as most important. Clarity-meditation allows us to remove the clutter that is constantly crowding our minds and our thoughts. This clarity allows us to see the bigger picture of our lives and what path is best for us to take as well as who should continue to be included in our journey. Productivity-the practice of meditation allows us to focus and eliminate distractions as they pop in and out of our thoughts so that we can better focus on the important aspects of our lives. Stress Relief-regular meditation can reverse the affects that stress has caused and allows us to remain calm when we face bumps in the road as we move along with our goals. The calmer you are the better you are at making solid well thought out decisions. Enjoy meditation and all of its benefits this month and every month! Namaste Want an organic way to grow flowers, vegetables and herbs, enrich the soil for landscaping plus recycle food and yard waste that is clean and great for the environment? 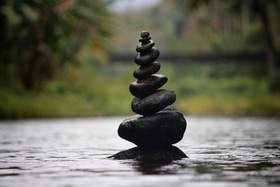 Feeling stressed? Needing (or wanting) to slow down and catch your breath? It seems the busier we are...... the busier we become. Over scheduling seems to be an ongoing trend for so many of us. Work has deadlines, family and children have schedules and commitments and with technology ever present in our lives it can seem nearly impossible to truly 'get away' and have time just for you. My smartphone is always by my side and I am constantly checking my emails...constantly. How did we survive before.....well we did and most likely we were calmer, less stressed, engaged in conversations with people that we actually knew, had more time to do the things we wanted to do and maybe were a little more relaxed and possibly even happier. It's not that technology is a bad thing, on the contrary, but it seems it has taken over our lives and we rely far too heavily on it. Have you ever read a work email and it just ruined your day/ night/ vacation? You can't go back once you've read it...damage so to speak is done and it's hard to get your mind fully back into your off time. Over time comes the stress of never really being away from your job. Even more problematic when your job is not really your passion. You may be in a situation (work, family, other commitments) where you can't shut down or choose not to respond to email/calls. But what you can do is use meditation and mindfulness to help ease the stress. Let's start with a short quiz on your current state of mindfulness. Think through the following questions and your responses, looking for any patterns and what they may mean:
There isn't a right or wrong answer to any of them, but more a signal that you may need to slow down and listen to your body. Unsure of where to begin, below is a simple practice to the beginnings of being fully present. First, and most importantly is to find a quiet place where you won’t be interrupted and a place where you can comfortably sit. I suggest wearing comfortable, non-binding clothes and dim the lights or light a candle to set the calming mood.
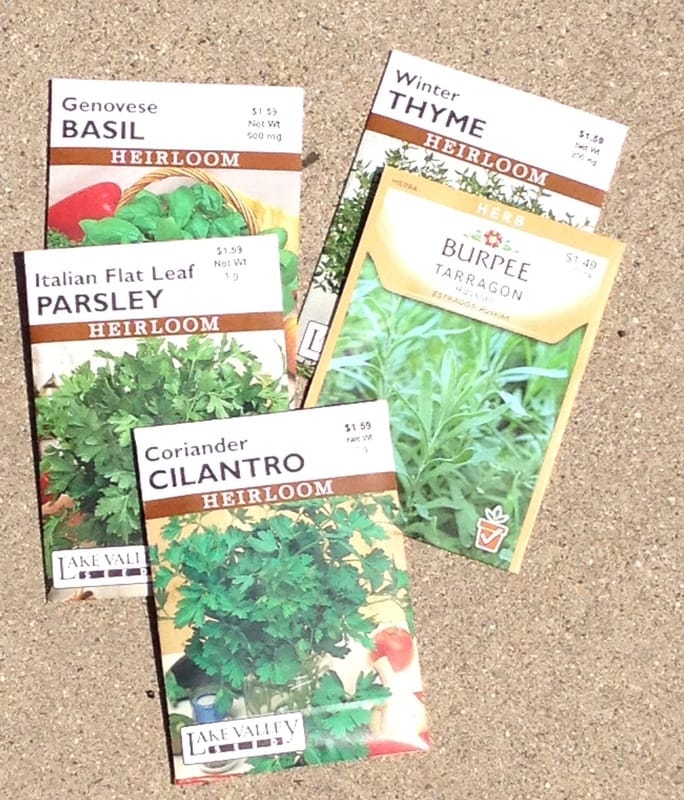
When finished, sit quietly for 30 seconds to 1 minute. At first you may find your mind wandering, make a mental note of what happens~ what you hear, smell, feel and make no judgements, moving back to sitting quietly, observing the moment and focusing on your breath. Practicing mindfulness is relatively simple but it can for some be difficult at times, the goal is to keep practicing, in time it will become very easy and enjoyable!  With warmer weather now hitting the midwest and seeing my first crocus blooming this morning I'm ready to get outdoors and begin planting! Eating healthy doesn't mean depriving yourself of any particular food group or flavor. A healthy diet for me, that is sustainable long term, includes all the foods that I enjoy, but being mindful of portion sizes, number of calories needed per day and getting plenty of exercise and rest. Cooking with herbs adds a fresh and flavorful addition to your favorite recipes. However buying herbs from the market or grocery can be so expensive and sometimes hard to find when you need them. In addition, once you open the package from the store the shelf life is greatly reduced. Growing fresh herbs guarantees a steady supply throughout the summer and well into the fall and even winter if you properly care for them. I use herbs in a variety of ways and am sure there are so many more ideas. I'd love to hear from you, please feel free to share:
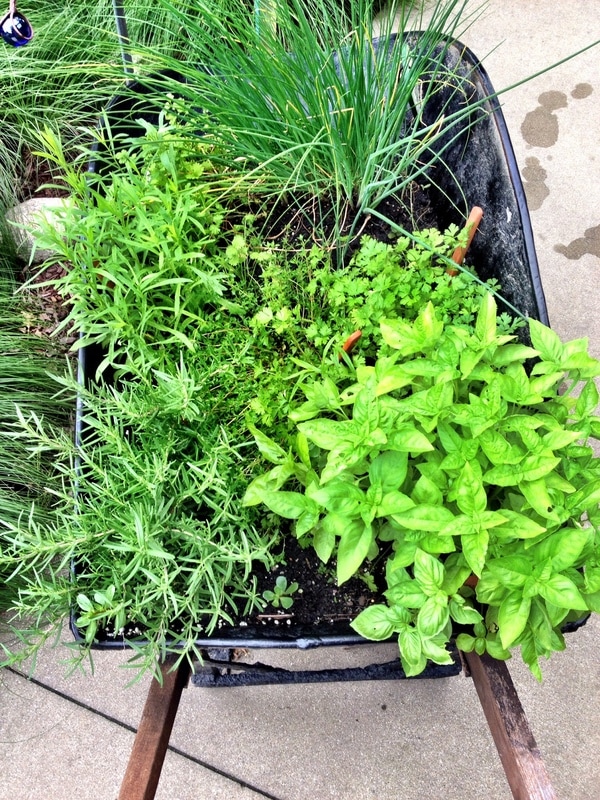
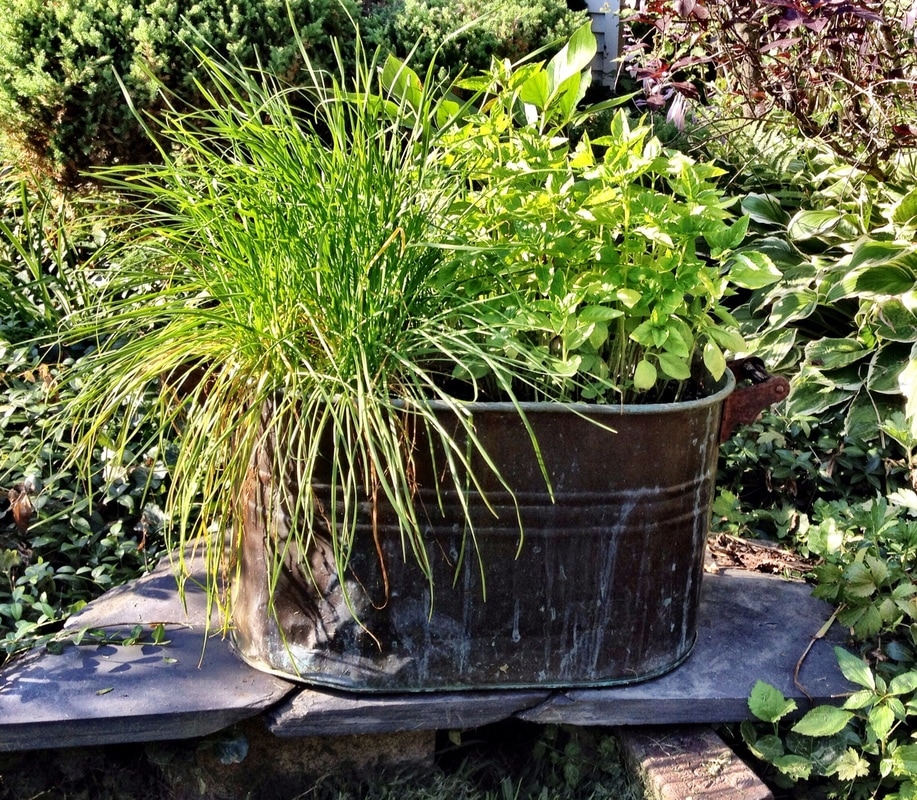
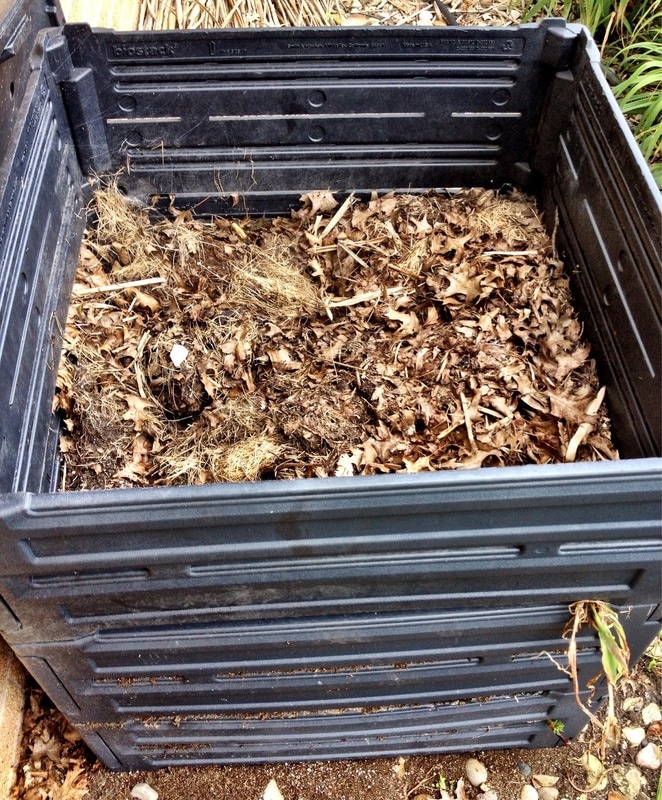
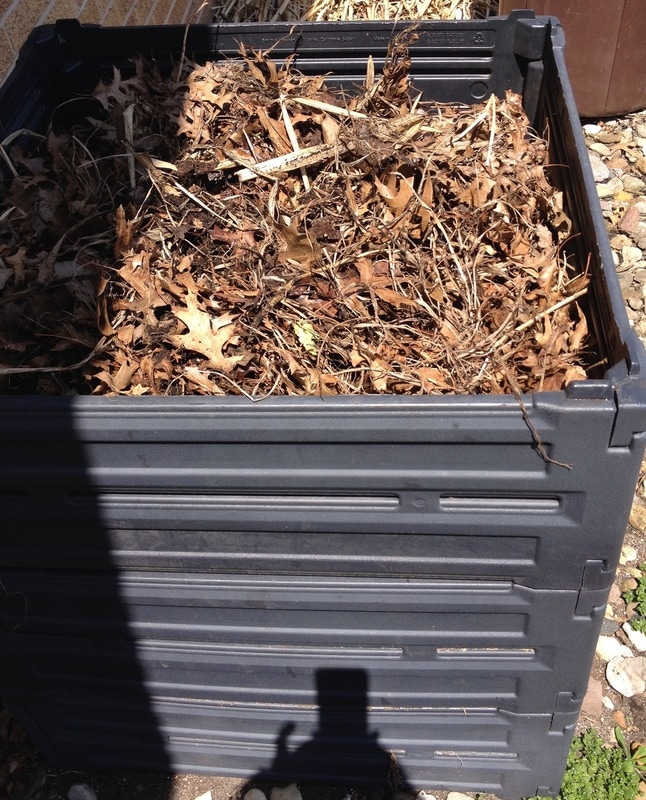
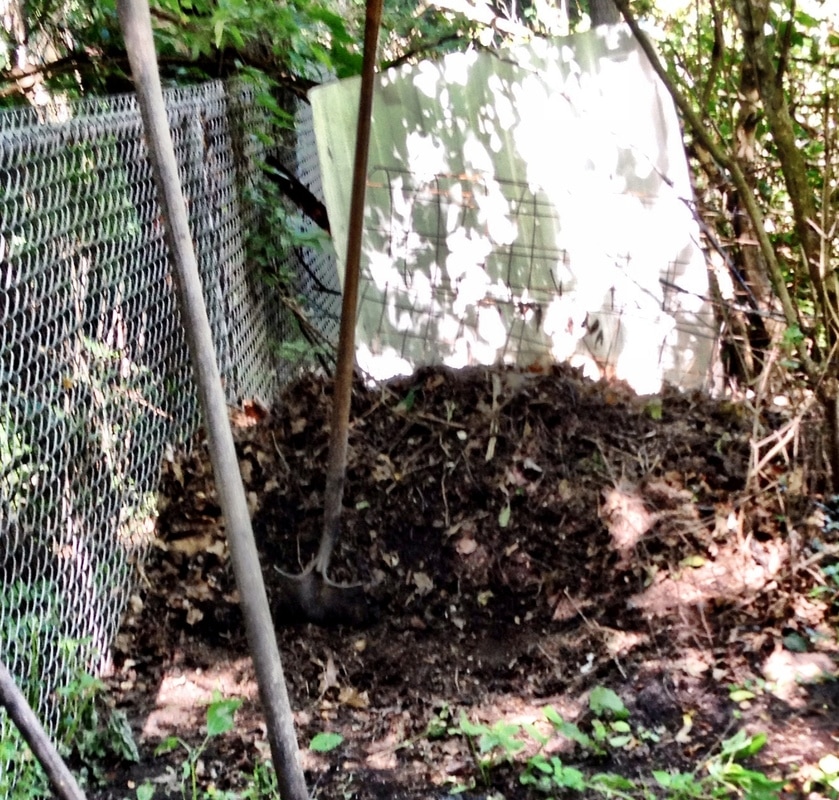
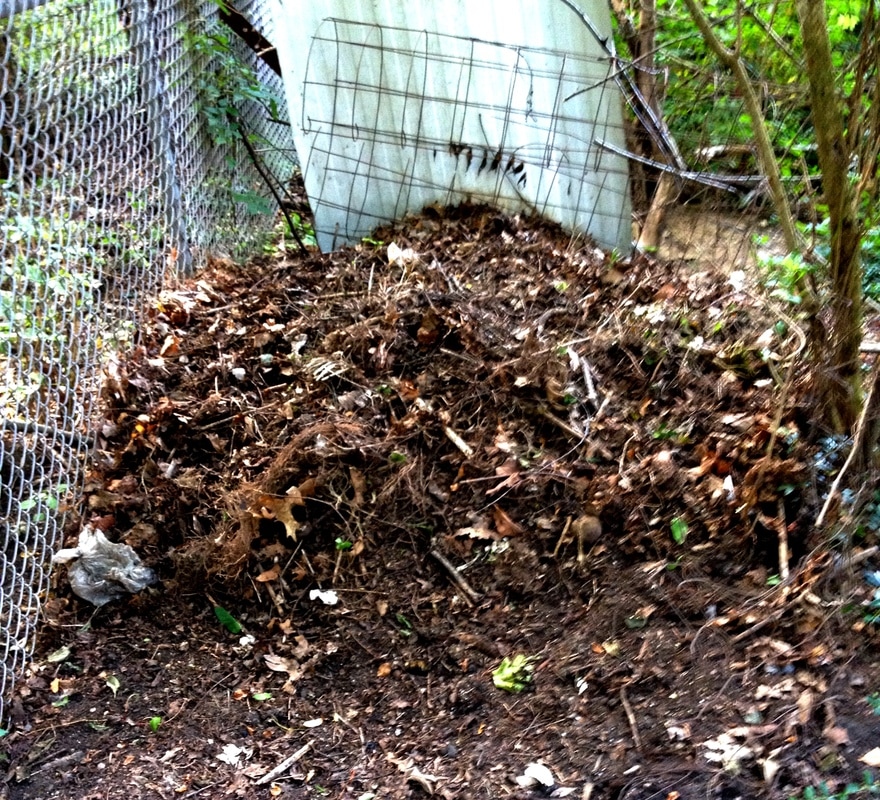
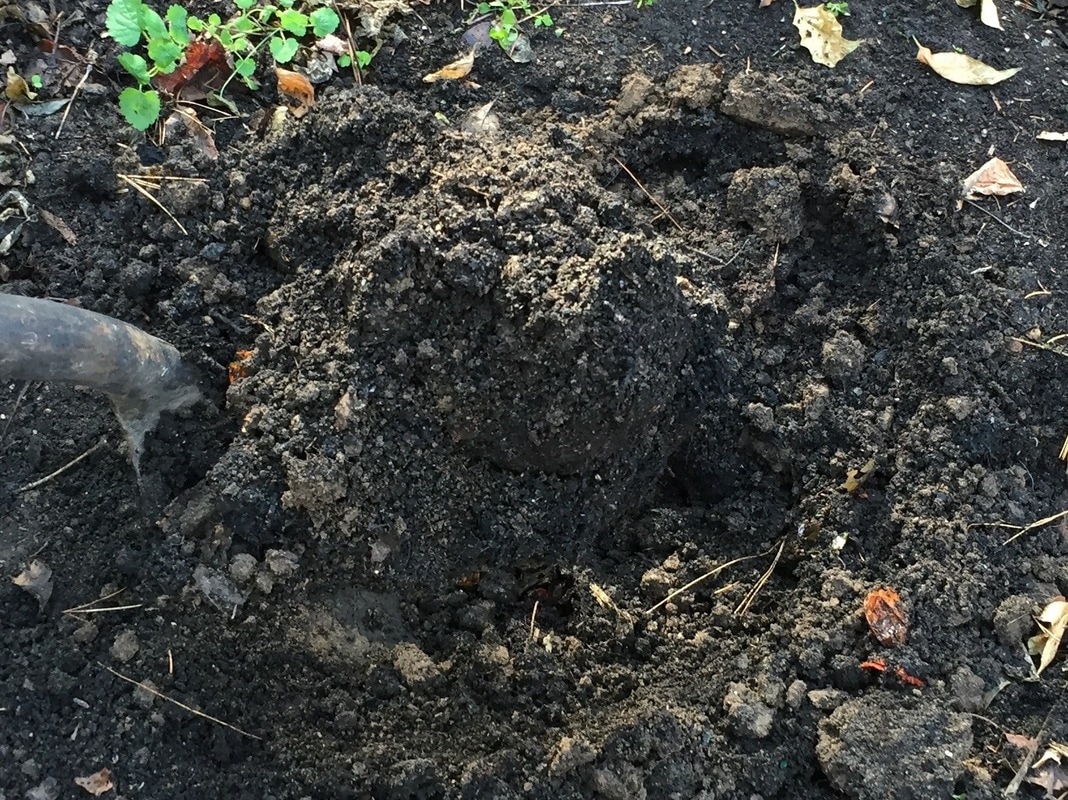
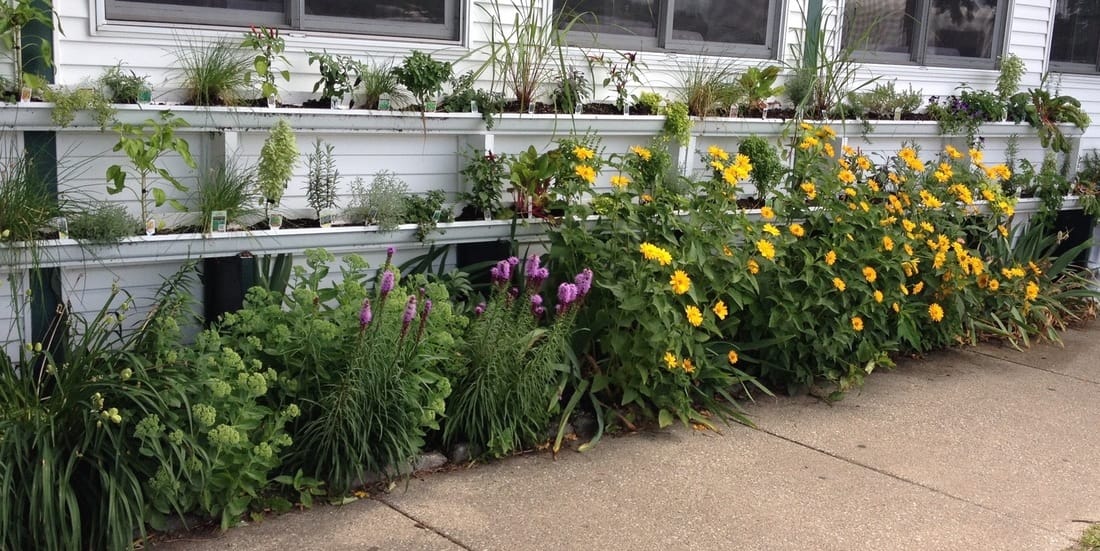
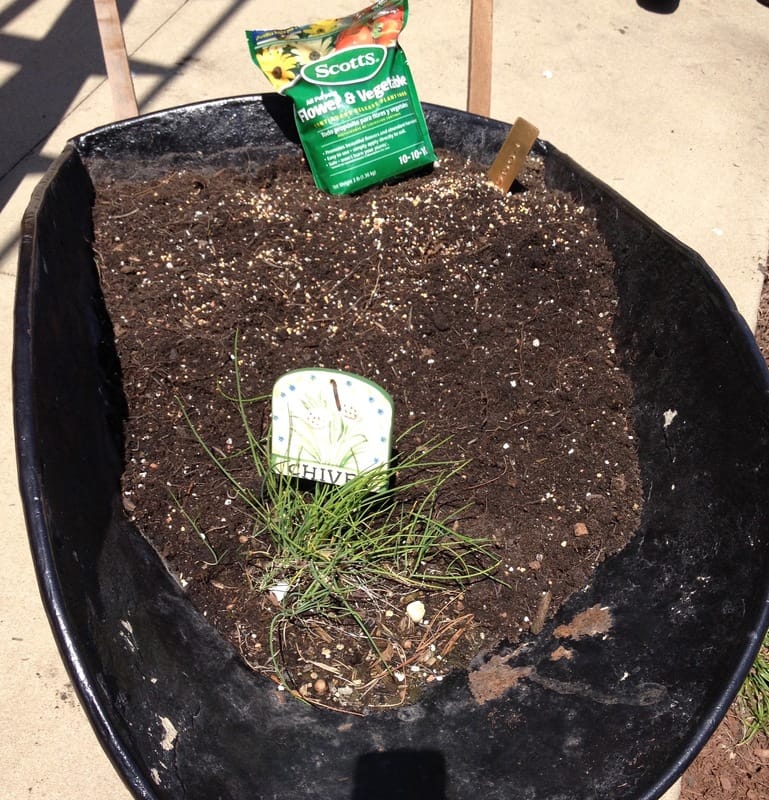
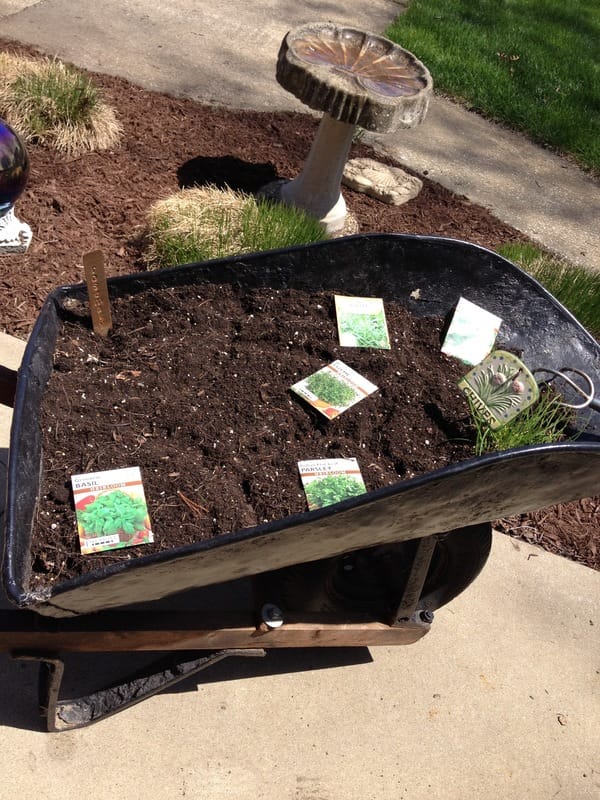
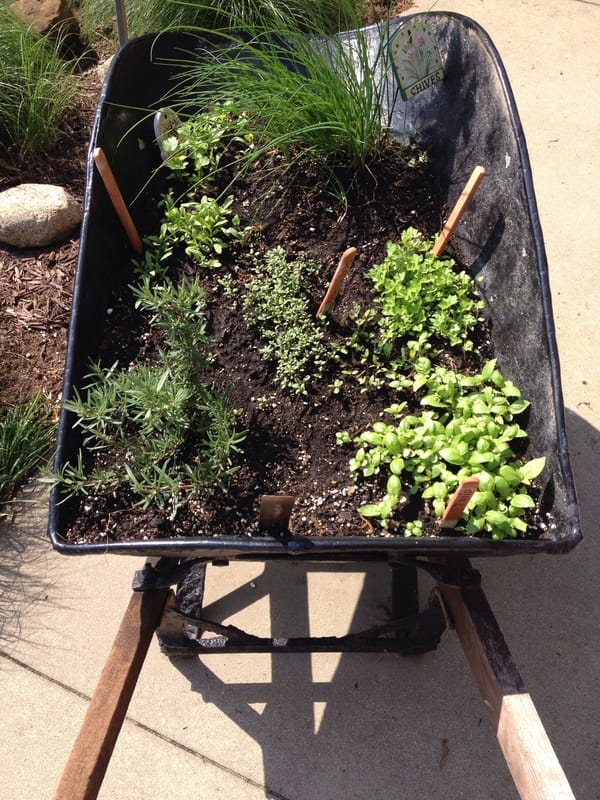
I also have a vegetable garden that is located behind my garage and when I first started planting herbs it made sense to put them alongside my vegetables. The problem I found was that they weren't handy and I tended to forget about them. The solution I thought was to have the herbs right outside my back door where the kitchen is located. But the next step was to figure out what to grow them in so that my patio wasn't cluttered with individual pots yet was easy to water. Enter....a very old ready for the trash wheelbarrow. This particular wheelbarrow was all beat up, kind of lumpy inside from mixing cement and not getting it completely cleaned out before the cement residue dried, but for some reason I had saved it. I thought this would not only make one easy pot to house all my herbs but it would look fun on my patio which is right outside my kitchen door, and next to the grill, for easy access as I prepared each meal. I painted the wheelbarrow inside and out with black paint and stained the handles a dark oak. To be honest having the herbs so handy makes it easy to think of creative dishes since I have to walk past them to/from the garage and can easily cut fresh what I need for each meal. It's also great for being creative with my dishes! So how do you make a fragrant and abundant herb garden? First, find the right space in your yard/patio/balcony. You'll want a spot that gets plenty of sun and is easy to access. Second, decide if you want one pot for all your herbs or several small ones. Be creative and consider that some herbs can be brought in for the winter and still thrive. Below are several ideas, but use what you already have at home, ex) do you have a favorite coffee mug with a broken handle, instead of tossing it, use it for herbs. If you have a big yard or a nice corner that is unused, you don't actually need a container, just plant directly into the bare ground or into raised beds. It seems everyone has their own preferred method that works for them so I'm writing only to share what works for me, not to discount what may work great for you. Depending on the composition of your soil and where you decide to plant your herbs, you may prefer to plant in fresh dirt, topsoil, garden soil or compost. I like to use a combination of compost that I've 'made' plus dirt from the season before to fill out the pot. Compost is rich in nutrients, improves the fertility of soil, requires less watering and can reduce/eliminate plant diseases. It's made a huge difference in the quality and size of my all my gardens (flowers, herbs and vegetable) plus it's a great way for me to recycle food and yard waste. More on composting in another post. Fertilizer- depending on the amount and quality of your soil you may need to use a fertilizer. Scott's is my favorite. Preparing your soil is critical, I like to mix dirt with compost for a rich soil plus mix in Scott's continuous release plant food. Seeds versus plants- I prefer seeds for most of my herbs with the exception of Rosemary which I like to start with an actual plant rather than starting from seeds. These seeds or these are easy to grow. Most garden stores and home improvement type stores carry seed packets too and each year I start looking at seeds and planning my garden on paper around February hoping that will somehow make a difference for when warmer weather will return! Whether you choose to use one large pot, several small ones, raised garden beds or right in the ground for your herb garden I strongly suggest marking each herb so that you can gauge which ones are growing, and to be honest, a few of the herbs look very similar when fully grown, so make it easier on yourself and consider adding markers, There are so many fun ones to try, like this one, this one, this one or this one. Herbs are best freshly cut for each meal, but if you choose to cut a small bunch (they do make the home smell nice) place them in a jar or glass of water for short term storage or use an herb keeper like this one which will allow them to remain fresh for several days to weeks. Lastly, is my herb bible so to speak, this is a great guide for learning about herbs and how to use them in everyday meals. Seeds normally are planted just below the surface and will begin to sprout within a few days. Water gently and if you don't see growth within the time frame on the seed packet, plant again! Sometimes if you have a huge rainfall when the seeds are newly planted it can wash them out, so don't be discouraged just replant! Enjoy!
What is Savasana? (Shah-vah-sah-nah) Savasana or Corpse Pose is the final pose of your yoga practice and while it may be one of the most important poses it can, for many, be one of the most challenging. All poses done in your asana practice prepare you for this final pose which can range in length from 10-20 minutes, however even 5 minutes of Savasana can bring positive benefits. Its Sanskrit name translates to Corpse Pose as Sava means Corpse. In traditional mat yoga, you are lying on your back on your mat in a very still, resting pose with your legs/arms spread out comfortably. It is the time where you close your eyes, shut your mind down and relax, unwind and be still in the moment. When you lay motionless while keeping your mind still, it forces you to relax. The more you practice this pose the easier it gets. Common Challenges of Savasana By the end of your practice your body and mind should be ‘tired’ enough to sufficiently relax for Savasana. While it may not seem like it, you do exert quite a bit of energy moving from pose to pose. However, even with the best intentions it can be difficult to shut out the day’s events or responsibilities on your mind for the rest of the week. Some common challenges of getting the most out of Savasana include:
It’s normal for the mind to wander, but with practice and a little patience with yourself you can begin to quiet the mind in order to gain the full benefits of Savasana. What are the Benefits? The intention of Savasana is to rejuvenate your mind, body and spirit.
How Should I Prepare for Savasana?
Give your Savasana the same attention you give to your other poses and notice the benefits. If you are consistent with your practice it will become easier as you add more minutes to your Savasana. |


 RSS Feed
